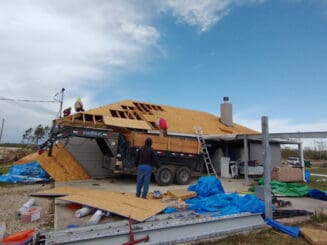
Step-by-Step Guide to Installing a New Roof
Installing a new roof is a big job that requires careful planning and execution. Here’s a step-by-step guide to help you get the job done right:
1. Prepare Your Home
Before replacing your roof, make sure that your house is prepared first. Remove any heavy items like furniture, window treatments, etc., and then cover the ground with tarps or plastic sheeting to protect it during the construction process.
2. Check Your Permits
Most municipalities require permits for home renovations of this size, so check with your local laws before beginning work on the roof.
3. Remove the Old Roof
To begin the roof replacement, carefully tear off all of the old shingles and underlayment from your roof using a flat pitchfork or flat shovel. Remove vents and pipe flashings. Remove all nails from the roof deck. Dispose of all debris safely to prevent it from becoming an environmental hazard.
At this point of installing a new roof, it’s time to inspect the decking. Make sure there are not any bloated, soft, or dark spots that show water damage on the decking. If there is any decking that needs to be replaced, now is the time to remove the damaged decking and replace it with new decking.
4. Install Drip Edge
Drip edge is step 4 and also step 5.5. The drip edge should be installed at the eaves before the underlayment. This allows any moisture that gets under the shingles to run down the water-resistant underlayment and off the drip edge protecting the edge of the roof decking and the fascia. However, you apply drip edge to the rake after you install the underlayment. You might wonder why the difference; installing the drip edge on top of the underlayment at the rake allows for protection from wind and wind-driven rain. It effectively seals the underlayment down to the deck, not allowing the wind to pick up the underlayment and let the rain go underneath.
5. Install underlayment
Once all of the shingles are removed from your roof, apply underlayment to protect it from water damage and provide extra insulation against extreme temperatures. Depending on where you live and the building code, you may need to install ice and water barrier membrane to the eaves. Baker Roofing and Construction always apply ice and water barrier to the valleys, around skylights, and around chimneys. In Texas, ice and water barrier is not required at the eaves.
6. Flashing
Install all step flashing or continuous flashing on sidewalls, chimneys, valley metal, and skylights after underlayment has been installed. Pipe flashings are installed with the bottom over the shingles and the top directly to the underlayment. Therefore, you will be installing all the pipe flashings and vents during the field shingle installation.
7. Install Shingles
Step 7 to installing a new roof begins at one edge of the roof, installing starter shingles. Starter shingles are a special solid strip of shingle that gives a perfect solid first course of shingles for ultimate protection. Then you begin to install the field shingles per the manufacturer’s requirement. Ensure all nails are properly driven flat and are not going in at an angle or going too deep into the deck. Additionally, be sure that the shingles are being installed in straight lines with accurate and consistent exposure. For the hip and ridge, often, three-tab shingles are cut and used; however, there are upgraded hip and ridge shingles available from all manufacturers. We always recommend installing a specific hip and ridge shingle versus a three-tab shingle which is thinner and more prone to damage in hailstorms.
8. Seal All Exposed Penetrations and Flashings
Sealing all exposed penetrations and flashings will create an extra barrier between your home and the elements for increased protection against water leakage or structural damage over time. While most fasteners will be covered, a few will be exposed and will need to be sealed with an elastomeric polyurethane sealant. The elastomeric polyurethane sealant will be used on sidewall flashings against brick or stucco walls where the flashings enter the wall.
9. Clean Up
Finally, tidy up any tools or materials used during installation before disposing of them in accordance with local laws or regulations. Take extra time to find all nails around the yard and in the bushes. Specialized magnetic rollers are used to maximize the potential to remove all nails; no one wants to step on a nail, after all.
If all that sounds like too much for you, then consider hiring a qualified professional. You can rest assured knowing that the roof will be installed properly and your back will be saved from endless trips up and down the ladder carrying heavy bundles of shingles.
Back to Blog