How to Stop a Leaking Roof During a Heavy Rainstorm
Learning how to stop a leaking roof during a heavy rainstorm can mean thousands of dollars less in repairs.
Roof leaks come in different sizes. Some could take months to develop into visible damage, while other leaks are much more dramatic.
Learn how to make a temporary roof repair that will hold up long enough to keep the damage down to a minimum. Once the storms have passed, you can call a reputable roofing company to make permanent roof repairs like Baker Roofing & Construction in Dallas, Tx.
Let’s get started. We will break up the whole process into these 6 steps.
 6 Steps to Stopping a Leak during a Heavy Rainstorm
- Identify the Leak
- Dry and Clean the Immediate Damaged Area
- Trace the Leak to the Source
- Prepare a Temporary Patch
- Tarp the Roof
- Call the Professionals
Dry and Clean the Immediate Damaged Area
First, immediately move furniture, electronics, and appliances that could be harmed by the leak.
Then, clean up any debris from the leak damage and dry the area thoroughly.
You can use towels, mops, or wet/dry vacuums to remove excess water. Fans can help dry out walls and carpet flooring. Just be sure to clean well enough to prevent further damage.
Immediately move furniture, electronics, and appliances that could be harmed by the leak.
Identify the Leak
 Now we must identify the leak, and I don’t mean the source of the leak but the actual visible damage.
Now, this step sounds easy, right? Well, yes and no.
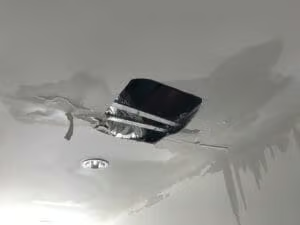
The more dramatic leaks, like when your ceiling holds water and bubbles, are easy to identify, but some leaks may be causing damage but are only showing small visible signs.
It is helpful to identify all the small signs of roof leaks to be able to locate the source of the leak.
However, inspecting the interior of your home occasionally is the best way to prevent small issues from becoming more extensive.
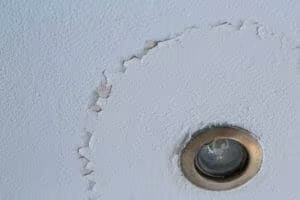
Inspect all the ceilings for water spots. Even small spots are indicative that a leak repair will be needed.
Also, look for damages to the drywall tape. Straight cracks in the texture identify damaged drywall tape, also called tape pops.
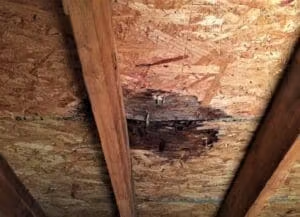
Additionally, inspect the attic space for discolored decking, molded lumber, or insulation that has that “wet cardboard smell”.
Once you feel confident you have located most of the damage spots, we can now track the leak back to the source.
Trace the Leak to the Source
Once you are confident everything of value is out of harm’s way, you can begin to trace the source of the leak.
To find the leak, you will need to access the attic. Once in the attic, maneuver your way to the spot of the initial leak. Begin to inspect all around, looking for dripping or running water.
Remember that water can run very far from the source before causing the damaged spot.
Here are few things to look to help you locate the source of the roof leak.
- inspect around vents and pipes
- examine around chimneys
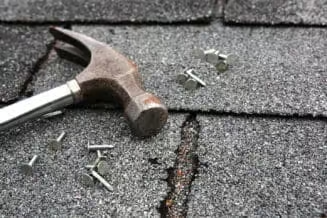
- look for water dripping from the tips of nails
- check the hips and ridges
When you think you have found the source of the leak, we can begin working on a patch.
Prepare a Temporary Patch for the Roof Leak
Now that we have the source of the leak in our sights, we can start to patch it up.
Items Needed:
- Roofing Sealant or tar
- Putty Knife
- Piece of a shingle, felt paper, rigid plastic, or some other waterproof material to use a patch.
- Paper Towel or cleaning rag
- Measuring Tape
- Scissors, Shears or razor knife
 First, dry the area as best as you can then apply the roofing sealant to the leak. Using the putty knife, work the sealant or tar into the hole.
Smooth the extra sealant out an additional 4 inches from the hole.
Now measure the area of the sealant and cut a patch from whichever material you chose that is 2 inches larger on all sides.
Apply sealant to the outside two inches of all the edges. Now place the patch over the sealant and firmly press into place.
Use the putty knife to seal the edges with the sealant that was pressed out during the patch installation.
This patch should now keep the roof leak sealed until a permanent repair can be made.
Tarp the Roof
Finding a roof leak can be like trying to find a needle in a haystack in a thunderstorm.
It may be necessary to tarp the roof if you can not find the source of the leak but know the general area, especially when more storms are on the way.
Make sure the rain has stopped. It is dangerous to be on the roof during a storm. Not only is the roof more slippery, but there is also the chance of a lightning strike.
To learn how to tarp a roof read our blog: What to Do When Your Roof Leaks.
Call the Professionals
After the storm has passed, call the professionals so that they can make a permanent roof repair.
Good, reputable roofing companies will also perform a basic inspection to look for more potential leaks. Then they will recommend all the roof repairs needed or advise you of your best course of action.
It may be the case that your home may need a full roof replacement. This might be the case if your roof is deemed unrepairable due to the condition of the shingles.
Old, brittle shingles are difficult to repair, and often trying to replace one or two shingles will turn into many more. Most roofers will not even attempt to repair a roof that is too brittle.
Final Thoughts
When the heavy rains start in Texas, you better be prepared. Baseball sized hail, thunderstorms, strong winds, and tornadoes can pop up in a moment’s notice.
Knowing how to perform basic repairs can save you thousands of dollars and many headaches. However, it is always better to be preventative than reactive.
We recommend having your roof inspected annually after the roof is ten years or older or anytime it has been in a significant hail storm. Keep your roof in top shape so it can do what it does best, protect you and your family.