How to Patch a Metal Roof
Metal roofs like standing seam and r-panel systems are incredibly durable and long-lasting. You can expect a 60 plus year lifetime with proper maintenance.
Metal roofing has long been the choice for barns, farmhouses, modern homes, and industrial buildings alike. Strength, sustainability, and attractiveness are all significant benefits of metal roofing.
However, even the most robust materials will need repair after years of abuse from harsh weather, hail, and debris. You can learn how to patch a metal roof here and get many more years of reliable protection.
Know When to Patch a Metal Roof
A hole in the metal roofing will require a patch or replacing the entire panel. We nearly will always recommend replacing the panel on your home, but on barns, patios, or in an inconspicuous place, repair patches can be a great solution.
Patches will not look good if they can be seen on the roof from the ground. However, if it can not be seen, a metal roof patch is less expensive than replacing the whole panel.
I want to re-emphasize that replacing the panel is the very best choice and that a patch is a temporary solution. A patch will be the weakest point of the metal roof system but if done properly it should last several years until better repairs can be made. Now let’s continue if a metal patch is for you.
How to Patch a Metal Roof
Patching a metal roof is not all that difficult, but it must be applied with precision.
Metal roofs expand and contract with heat. The patch, being smaller, will expand and contract at a different rate than the panel to be repaired.
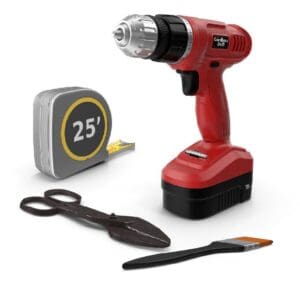
Following these few steps will ensure your leaky metal roof will be repaired properly. First, let’s gather the materials and tools needed for the job.
Material:
- Metal patch – similar metal to the panel to repair
- Urethane Caulk
- Pan Head Sheet Metal Screws
- Matching Touch Up Paint
- Cleaner
- Polyester Fabric Seam Tape (optional)
- Elastomeric Coating (optional)
 Tools:
- Metal Shears
- Drill or Impact Driver with Phillips Head Bit
- Small Putty Knife
- Caulk Gun
- Emery Cloth
- 600-grit sandpaper
- Paint Brush – 2.5″ (optional)
Step 1 – Prepare the Patch
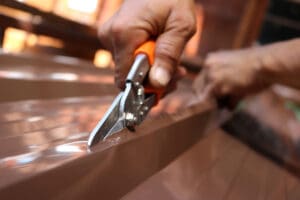
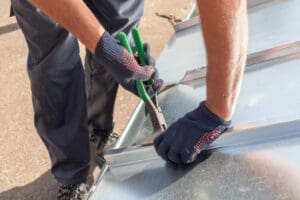
Choose a piece of metal that is similar to or the same as the panel to repair. Cut the patch to be at least two inches wider than the area to be patched.
Using the emery cloth, gently sand the edges free of burrs and roughness.
Step 2 – Prepare the Area to Patch
Inspect the damage to ensure nothing is extruding up that would interfere with the patch laying flat on the repair area.
If anything is obstructing the patch, cut or pound it flat if possible. If a flat surface is unobtainable, then replace the panel or make the patch larger.
Once the surface is deemed repairable, clean the area thoroughly with the cleaner. Make sure the surface is free from residue.
Step 3 – Install the Patch
Laying the patch over the repair, trace the outline of it on to the panel.
Using the urethane sealant, apply it to the outer two inches of the traced outline of the patch. Place the patch on the sealant and firmly press down.
The sealant should push out around the edge of the patch. Any spot where the sealant has not pressed out will need more sealant.
Use the putty knife and smooth the sealant around the edge of the patch. It should be uniform around the sides with no voids or gaps.
Claim Your Free eBook and Never Get Scammed by Contractors or Insurance Companies Again –Property Insurance Claim Process Made Simple
Step 4 – Secure the Patch
Install the pan heads screws around the perimeter of the patch uniformly. Every screw should be one inch from the edge, securely in the sealant.
Use screws that are only long enough to attach the patch to the panel. The screws must not be inserted into the roof deck to allow the patch and panel to expand and contract properly.
Install the screws every three to four inches around the perimeter, one inch from the edge. Important: proper installation of the screws will prevent failure.
The screws must be driven in straight down and just firm to the patch. Do not overdrive or underdrive the screws.
Overdriving can strip the hole, while underdriving will not secure the roof patch well enough. Likewise, driving it at an angle will result in a failure as well.
Finally, before moving on to the next step, double-check the sealant is covering all the seams well and smoothly. There should be absolutely no gaps or voids in the sealant at any point around the patch.
Step 6 – Paint to Match
Once the sealant has thoroughly dried and cured, you can prep the area for paint. Scuff up the roof patch and the panel with 600 grit sandpaper, being careful not to damage the sealant.
Painting is not necessary, but it may protect the metal better and camouflage the repair.
Patch a Raised Seam on a Metal Roof
 We do not recommend patching seams on standing seam metal roofing; however, it may be necessary to create a temporary patch until proper repairs are made.
First, start by cleaning and preparing the area as instructed in Step 2. We will use the polyester fabric seam tape for the patch.
Cut the tape four to five inches longer than the area to patch. Lay the tape over the seam and firmly press down on both sides of the seam to the deck.
Coat the seam tape with the elastomeric coating. Elastomeric is a specialized roof coating designed to give flat roofs 10-20 years more life. It will allow for the metal to contract and expand naturally.
Conclusion
Patching a metal roof is not an overly complicated task. It just takes time and careful attention to ensure the repairs are done correctly. Following this article will help you avoid making common mistakes when repairing a metal roof. Nevertheless, these repairs may sound like more than you are willing to undertake, you can always call a reputable professional roofer to inspect, repair, or make the correct recommendations.
Back to Blog